Here, in his own words and pictures, is David Wells' story of how he rebuilt his Vire 7, Serial number NO 24877
I bought "Harrier", a Thompson T27, in the Spring of 2003. It came cheap as there was no engine fitted, so I spent the summer under outboard power.
I inherited a Vire 7 from a chap in Southampton after repairing the seals on his Volvo Penta water pump; it seemed a fair exchange. I dragged it home and stripped it. Its condition was average with just about everything showing a little wear so I cleaned it and reassembled it. A new plug and gearbox oil, connected to the garden hose it refused to start. I tested for a spark and found none. I did a quick rewire of the ignition so I could use an external coil and condenser and hey presto she ran. Further investigation revealed a defective condenser. I duly ordered one from Fairways Marine and fitted it to find that I now had a working ignition system. Although the Vire ran perfectly it sounded a little rough, there was a fair bit of bearing noise. Unsure what should be done I put the engine under the bench in the garage.
Whilst browsing in a Junk shop in Birmingham I spotted another Vire 7 under a pile of motorcycle bits. After some haggling over how badly seized it was I purchased it for £50.
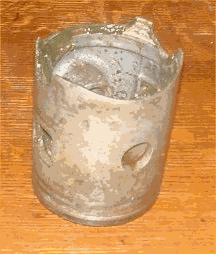
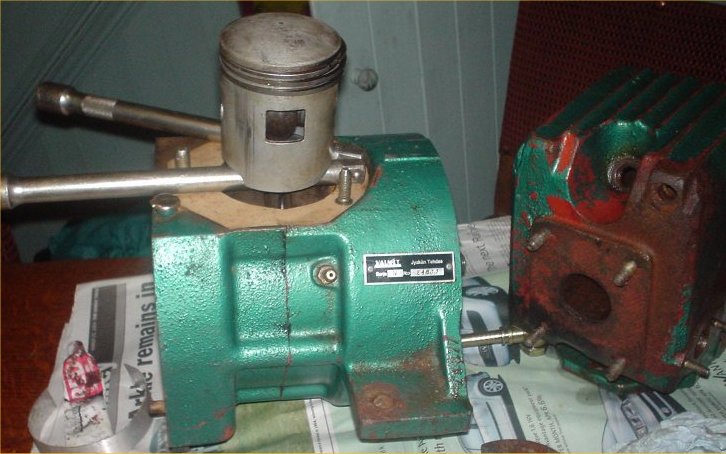
Externally it was much newer than my other Vire; I felt that with two sets of parts I could build one decent engine. It also had a rather neat stainless water trap/box on the exhaust . At home on the bench I set about un-seizing the piston. I tried everything: hot oil; tapping with a hide mallet; compressed air. It wouldn't move although I could get the cylinder base flange to about 25mm above its seat, at which point a quantity of rusty water was ejected. I inverted the entire engine and filled the cylinder/head/piston assembly with paraffin. Six days later I managed to tap the barrel off with a mallet to reveal a badly mangled piston.
Mangled piston 1
The rest of the strip down was straightforward. This time I decided to replace everything that needed it. The crankcases had been flooded so I had to assume that the big end was rusty. I borrowed a friend's fly press to push out the crank pin but after an hour of trying it hadn't moved a millimeter. A local garage has a twenty ton press, so after a small bribe I was able to get the crankpin out.
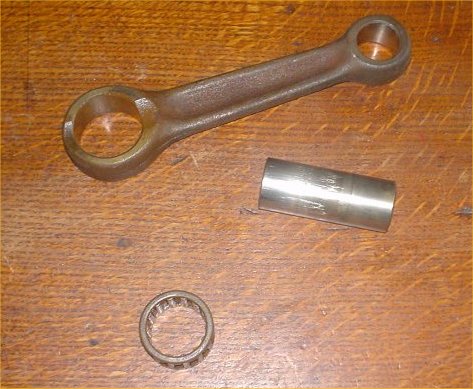
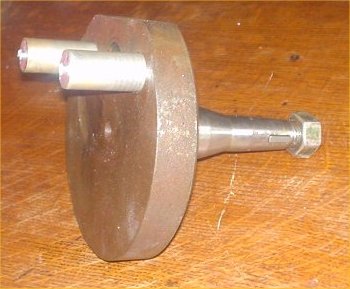
Connecting Rod, Big-End Bearing, and Crank Pin (Parts #15, 16 and 17 in Fig. 12 of the Spare Parts List)
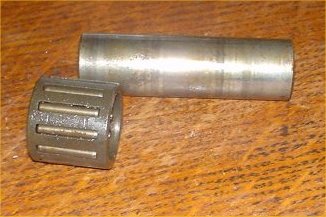
The big end bearing was rusty and worn and easily replaced by my local bearing shop "Goldline Bearings" in Telford with a K25 x 33 x20 mm needle roller cage bearing. Webmaster's Note: Other contacts have given the dimensions of the bearing as 25mm x 35mm x 20mm.
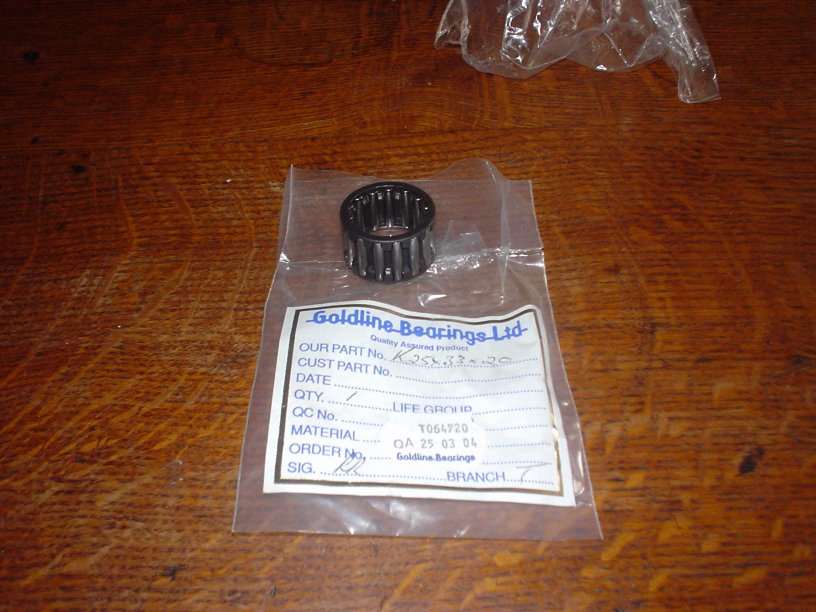
New Big-end Bearing
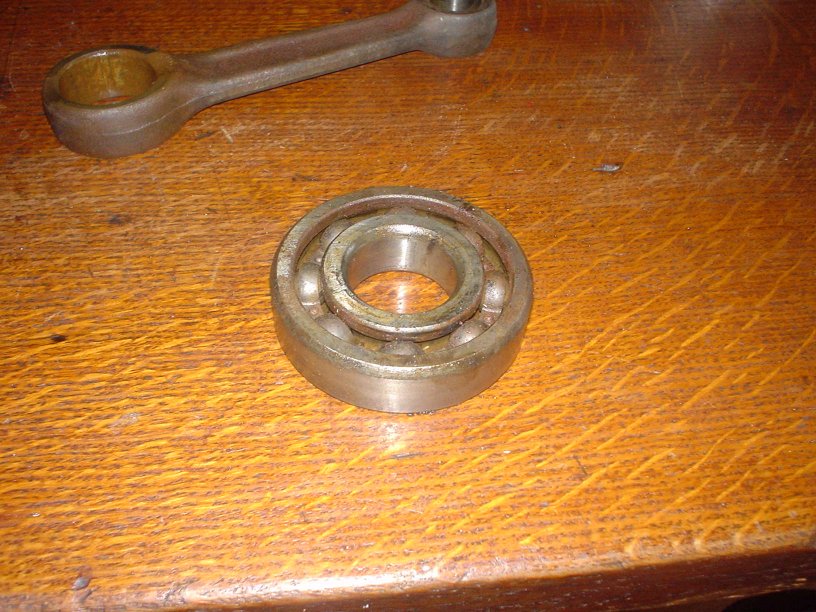
Old Bearing (left), New Bearing (centre) and frozen Crank Pin (right),
with Connecting Rod (foreground)
(frozen doesn't mean seized, it means just what it says - straight out of
the deep freeze (see below for an explanation)
I dressed the crank pin with an oilstone and measured along its length; there was negligible wear.
Two 20 mm mandrels were turned to align the crankpin.
Crank with home-made 20mm Alignment Mandrels
The crank pin went in the freezer overnight and the crank webs spent an hour in the oven, then the whole lot was taken quickly back to the garage where I pressed in the crank pin and then pushed out the mandrels.
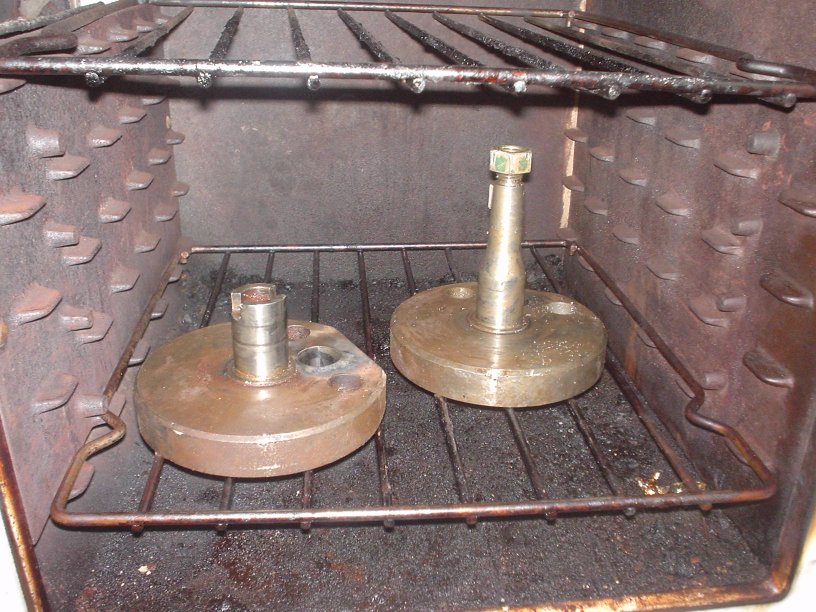
Crankshaft (a.k.a. crank webs) in the Oven (Parts #8 and 18 in Fig. 12 of the Spare Parts List)
Webmaster's Note: Heating the cranks causes them to swell, enlarging the holes for the crank pin. Conversely, freezing the crank pin causes it to shrink. The net result is that it's easier to reassemble the crankshaft, pin and bearing - although you will probably still need a 20 ton hydraulic press.
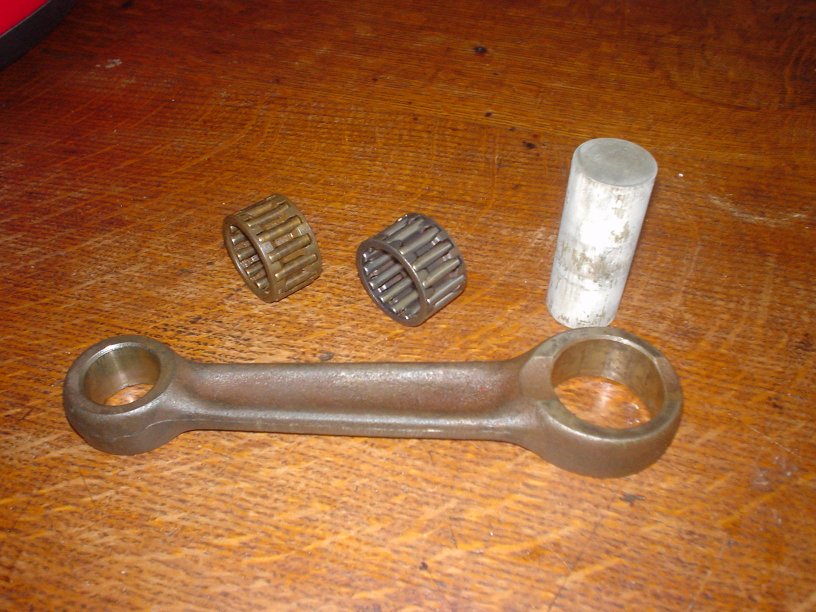
I used the little end from my first engine as the original showed signs of wear.
Small-end Bearing and Piston Pin (Parts #14 and 10 in Fig. 12 of the Spare Parts List)
The main bearings were VW beetle rear wheel bearings but were rusty and damaged so a new set was purchased.
New Main Bearing (one of two - Parts #7 in Fig. 12 of the Spare Parts List)
The crankcases were warmed and the bearing pressed in along with new seals.
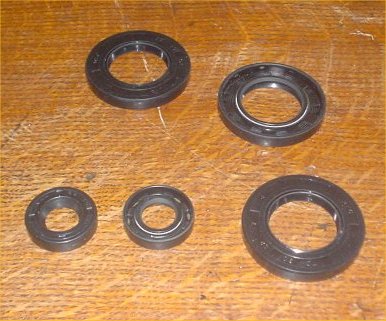
New Seals
I contacted Fairways Marine to order a new piston and after I'd picked myself off the floor I decided that £250 (375 Euro) for a piston was excessive. Luckily, Damian, the Webmaster of this website, came to my rescue and very kindly donated his old piston. It had slight scoring which cleaned up and I honed the barrels with a glaze buster and assembled the engine, making new paper gaskets where needed.
Crankcase re-assembled, ready to re-fit the Cylinder
Cylinder re-installed
The gearbox was checked and found to be OK. The water pump was rebuilt with new seals and impellor, and fitted.
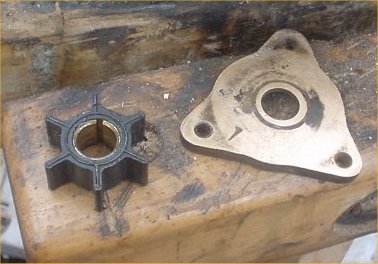
Impellor and Waterpump Mounting Plate
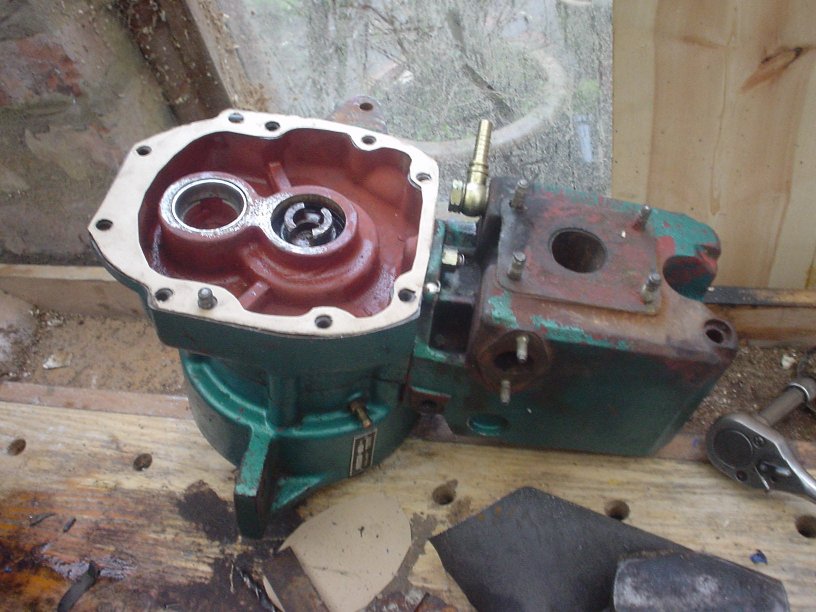
Ready to re-fit the Gearbox Webmaster's Note: Notice the brass "banjo" fitting for the water outlet on the bottom of the cylinder. This differs slightly from the more common "fixed" fitting. If you loosen the "banjo", take care to re-align it correctly when refitting it, in order to ensure that water still flows freely through the fitting.
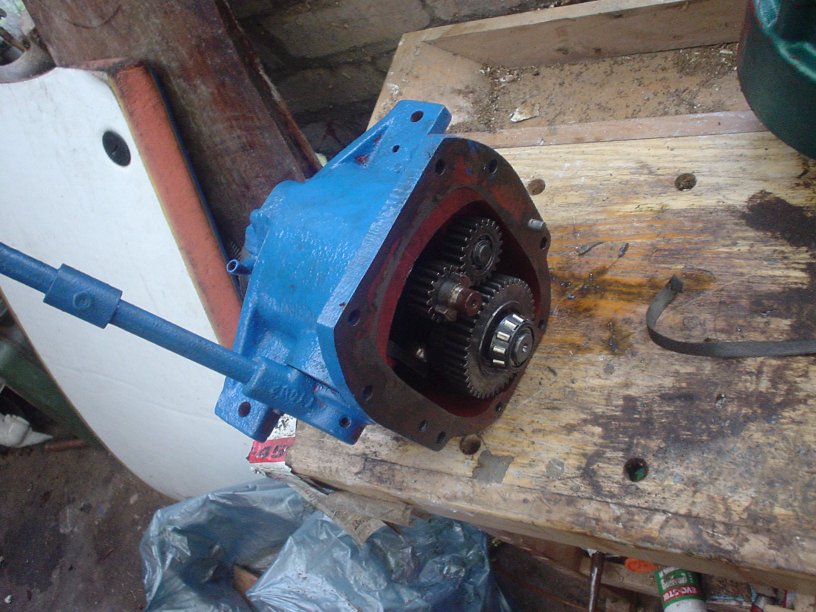
Gearbox, ready to re-fit (I know, the colour doesn't match, but who's going to notice ?)
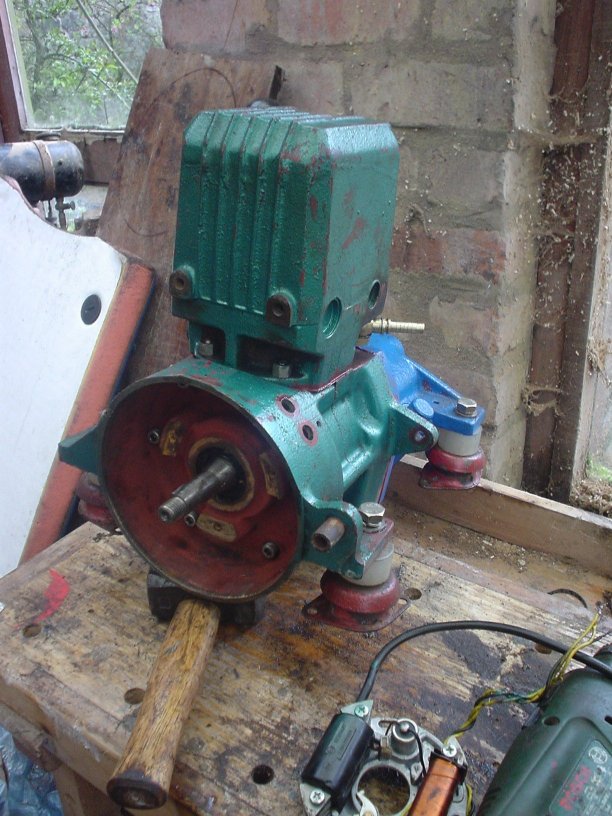
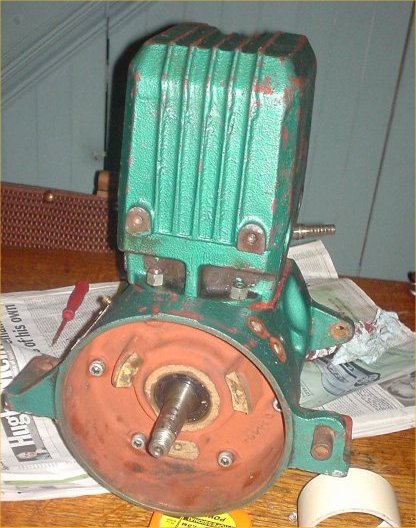
Mechanical Parts reassembled - now for the Ignition
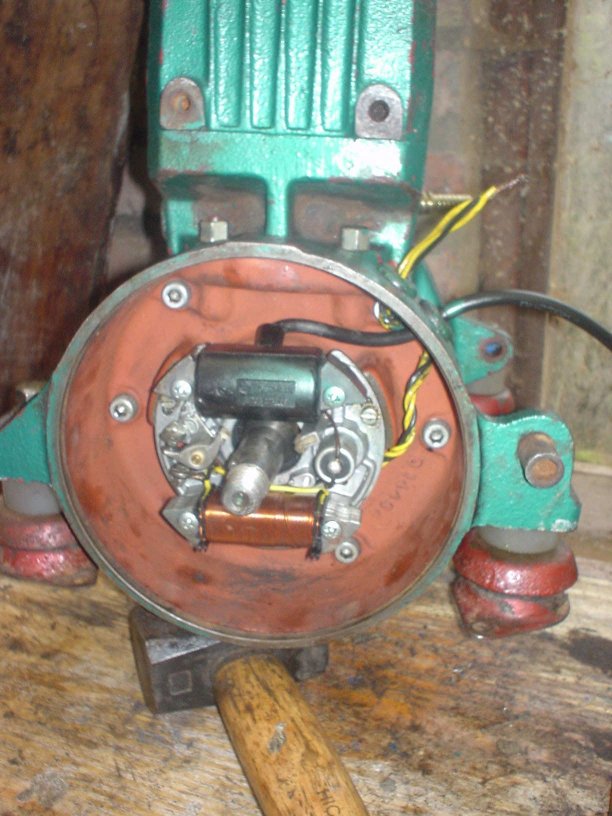
Magneto re-fitted
The carb was stripped and cleaned and the diaphragm was checked for leaks, timing was set using the marks I made before disassembly.
Mounted on my Black and Decker workmate the garden hose was connected to the inlet, a Ducati muffler to the exhaust to keep the neighbors happy. Petrol and some power from the jump leads and the Vire started immediately and settled down to a steady tick over.
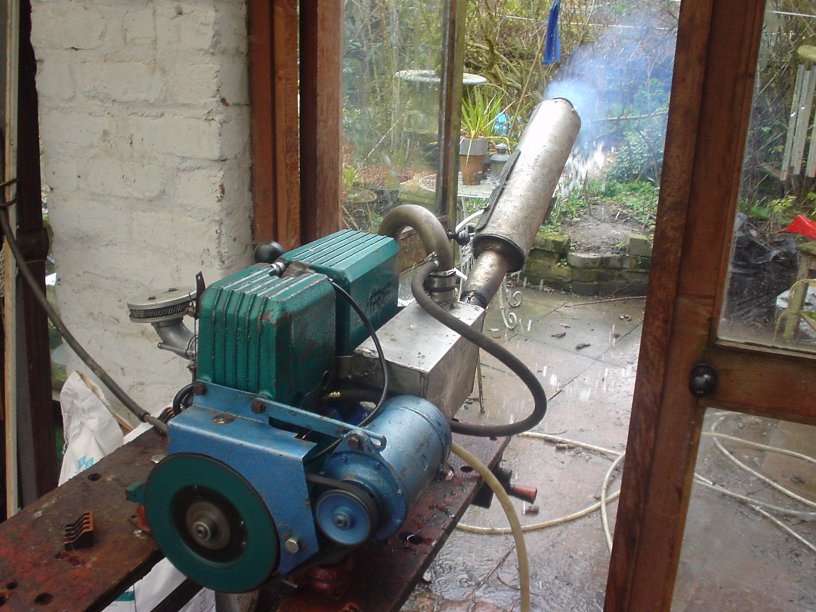
Beautiful Sight - Worth the Effort
See part 2. "Fitting in the boat" coming soon.
Serial number NO 24877
Parts List


